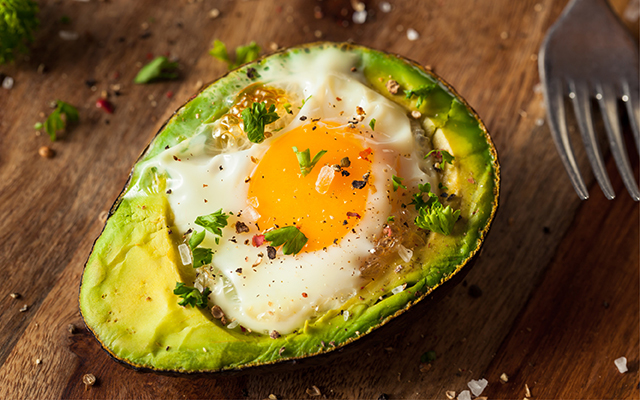
How Many Eggs Per Day Can Someone Eat on Keto Diet?
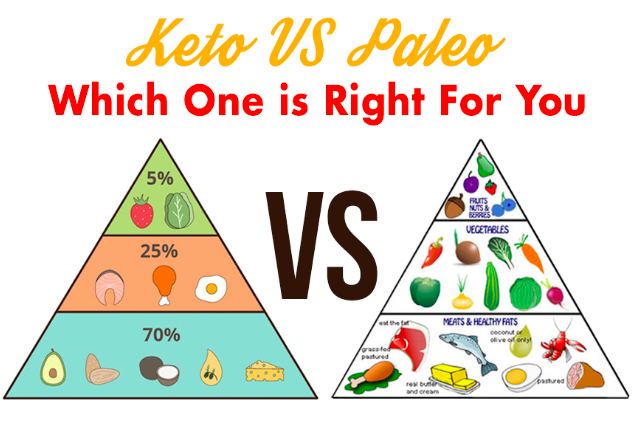
It is trendy to be slim and beautiful. That is why people search for various methods to lose extra kilos and shape the body. Scientists, doctors, coaches, and even housewives try to develop their approach to weight loss. Most people feel too lazy to exercise. Besides, to burn at least 500 calories, a person should train for not less than 60 minutes. Not everyone can spend so much time in the gym being overloaded with daily duties.
…
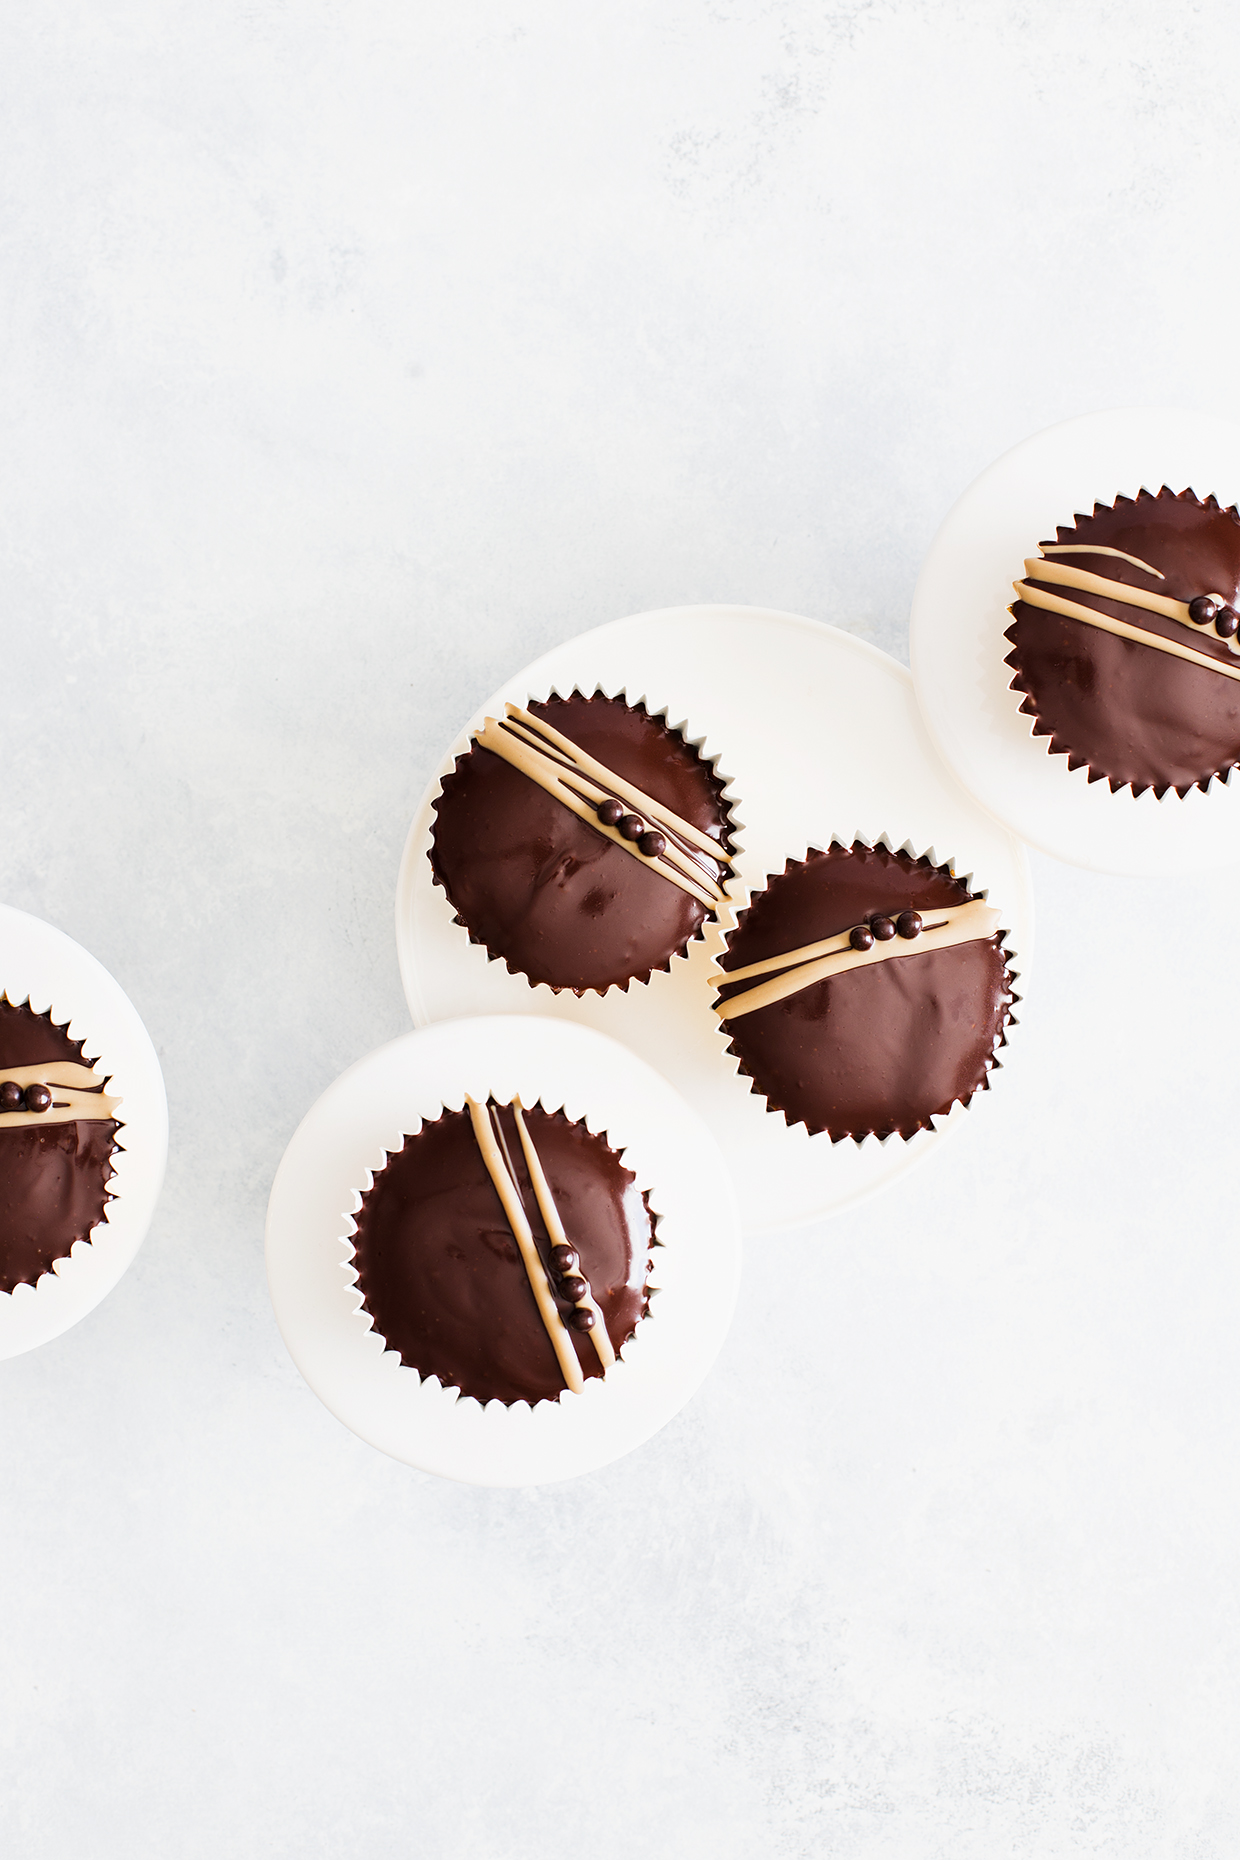 You guys, I am in full-fall-frazzle mode. Which just means I don’t have my shit together for Halloween (or the rest of the holiday season for that matter) but I do have these cupcakes dialed in so we are making progress. Thank goodness these are EASY to bake and decorate. The ganache on top takes these cupcakes from regular to fancy with that glossy, shiny lid but it couldn’t be easier to pull off. It’s literally a melt, stir, pour situation but makes for the most elegant cupcake frosting.
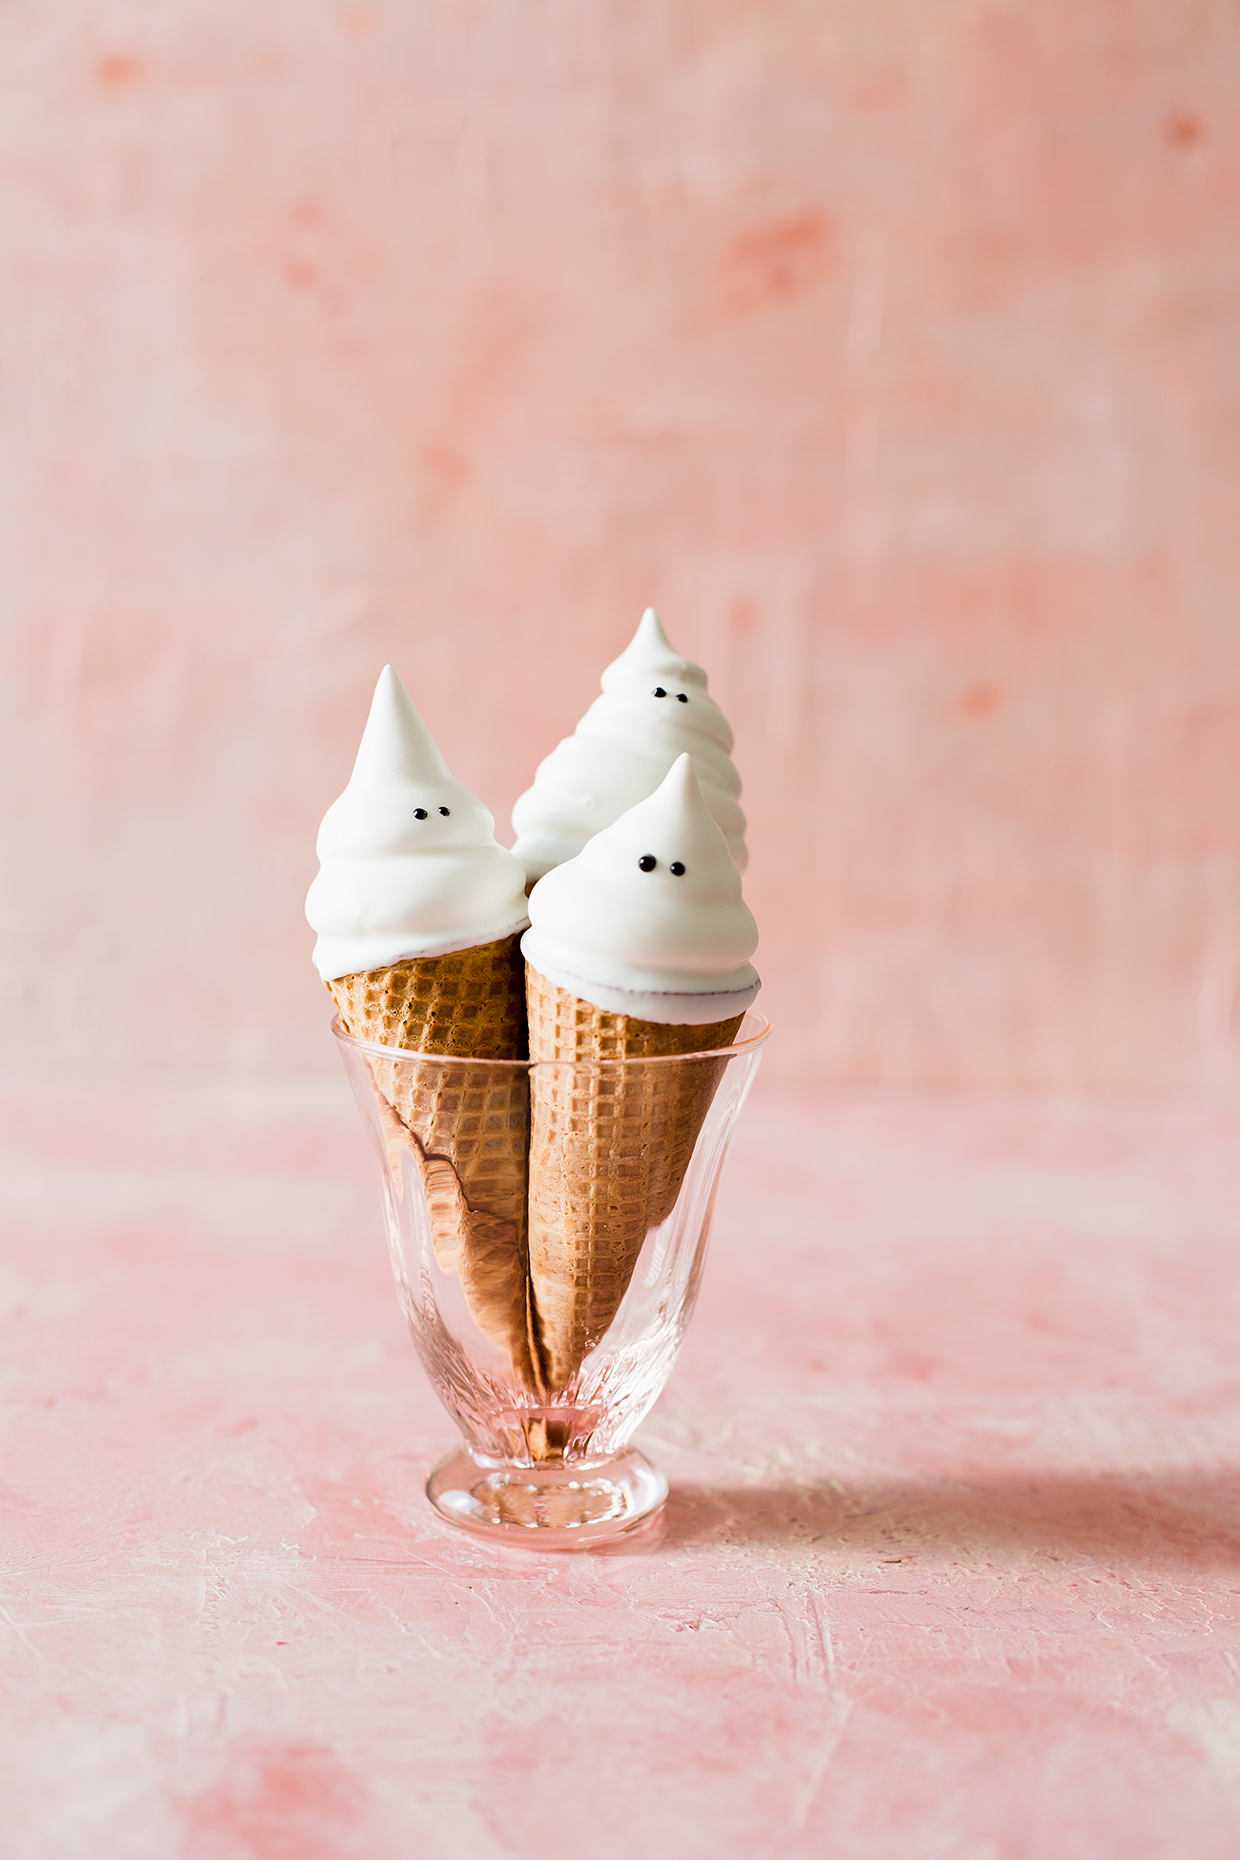 I know I am totally ahead of the schedule for Halloween treats, but I just couldn’t keep these from you. I love that I’m in a stage of life where I can share similar things from my childhood with my kids, like conecakes! Have you ever had a conecake before? When I was a kid my mom would make them in cake cones (the wafery, flat-bottom cones) and I LOVED them. Not just for their novelty–I mean, once frosted they look like ice cream cones–but also because there was some magical texture thing that happened between the cake and cone as they baked. The cake semi-absorbs into the cone for a chewy, crunchy, exterior and a fluffy cake interior.
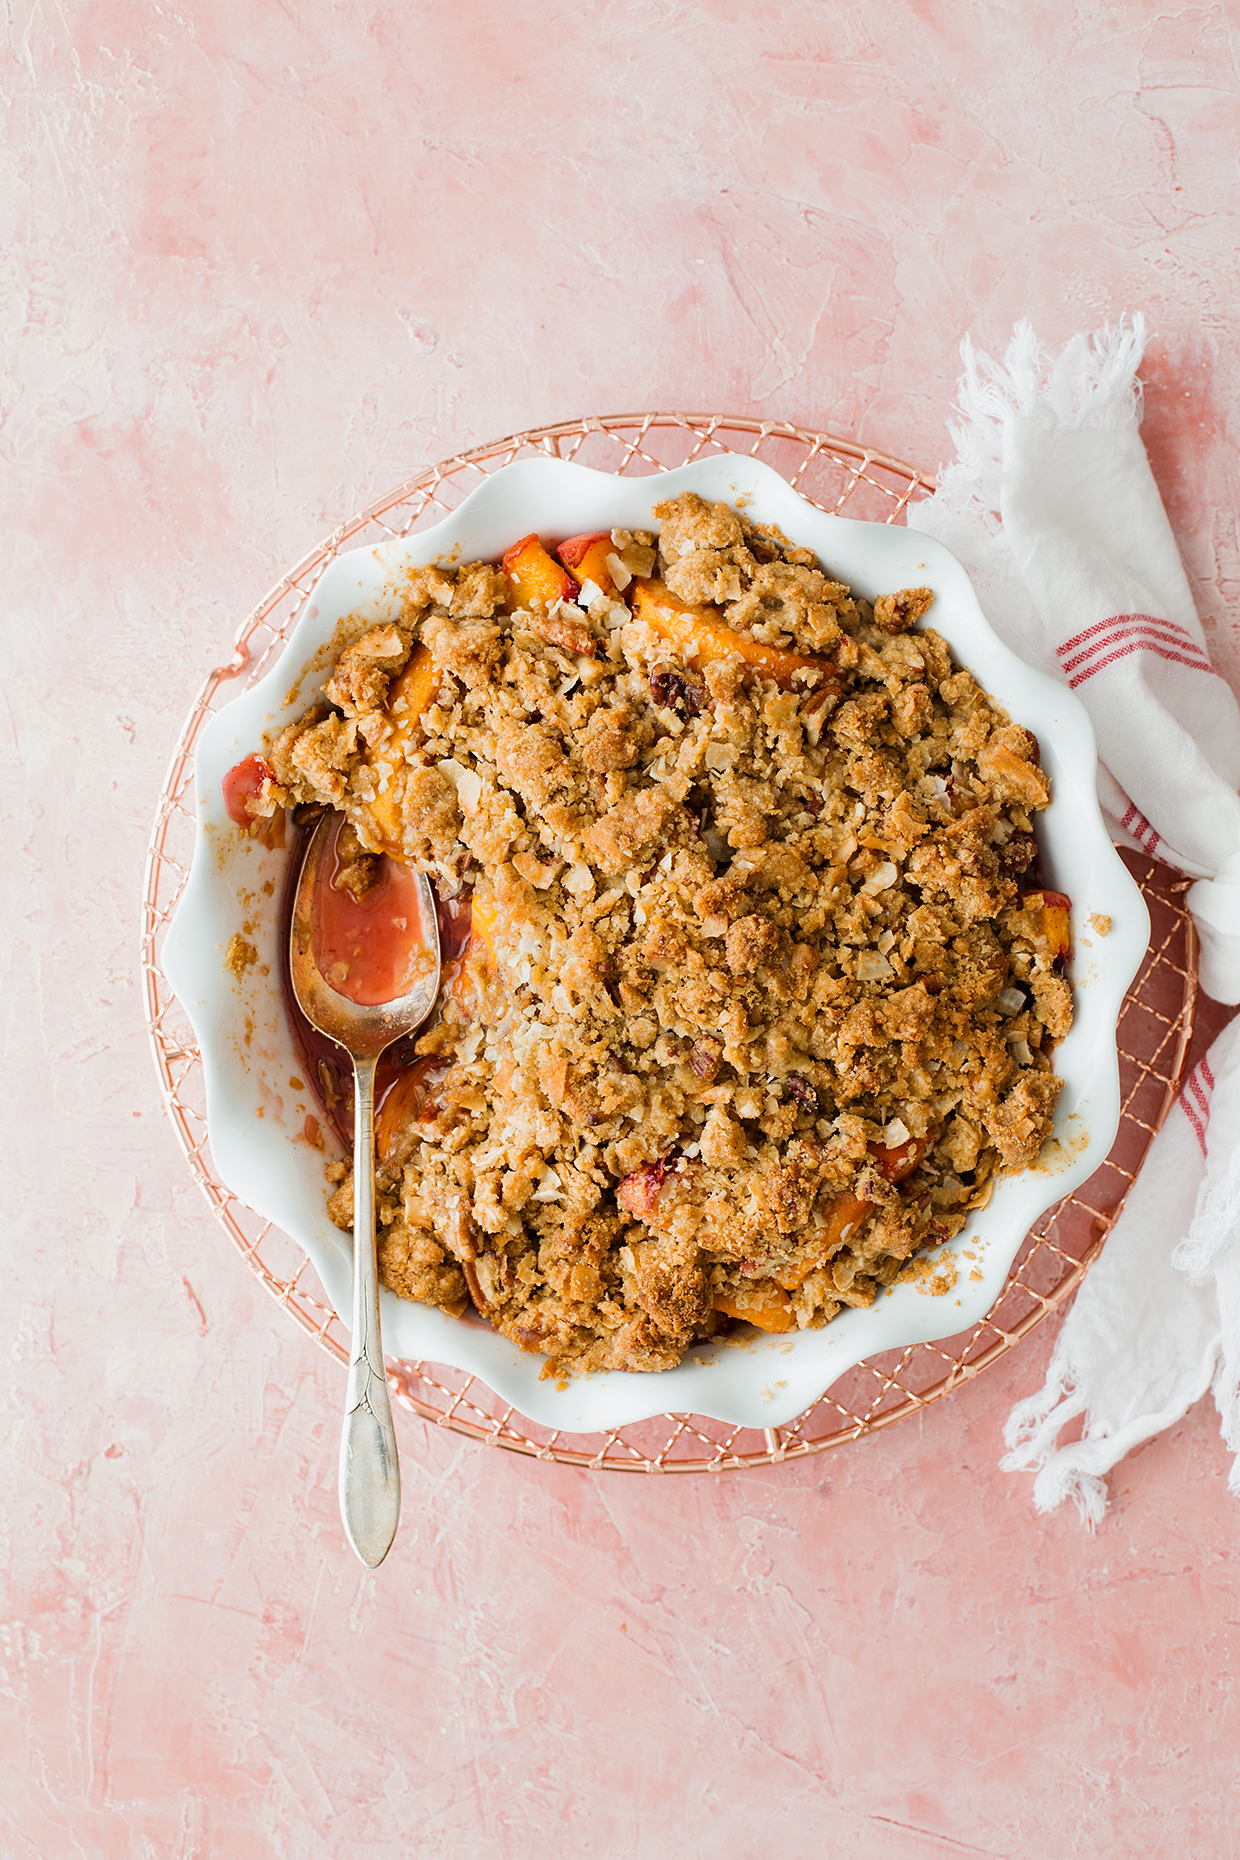 One of my first memories takes place at a u-pick peach orchard. It’s not super clear but I remember eating peaches that dripped down my arm with my grandpa and that golden, late summer California sunshine. It’s one of my favorite memories with one of my favorite people and one that gets evoked every summer when stone fruit season rolls through. Needless to say, whenever peaches are good I get a nostalgic urge to bake something unfussy that lets the fruit shine.
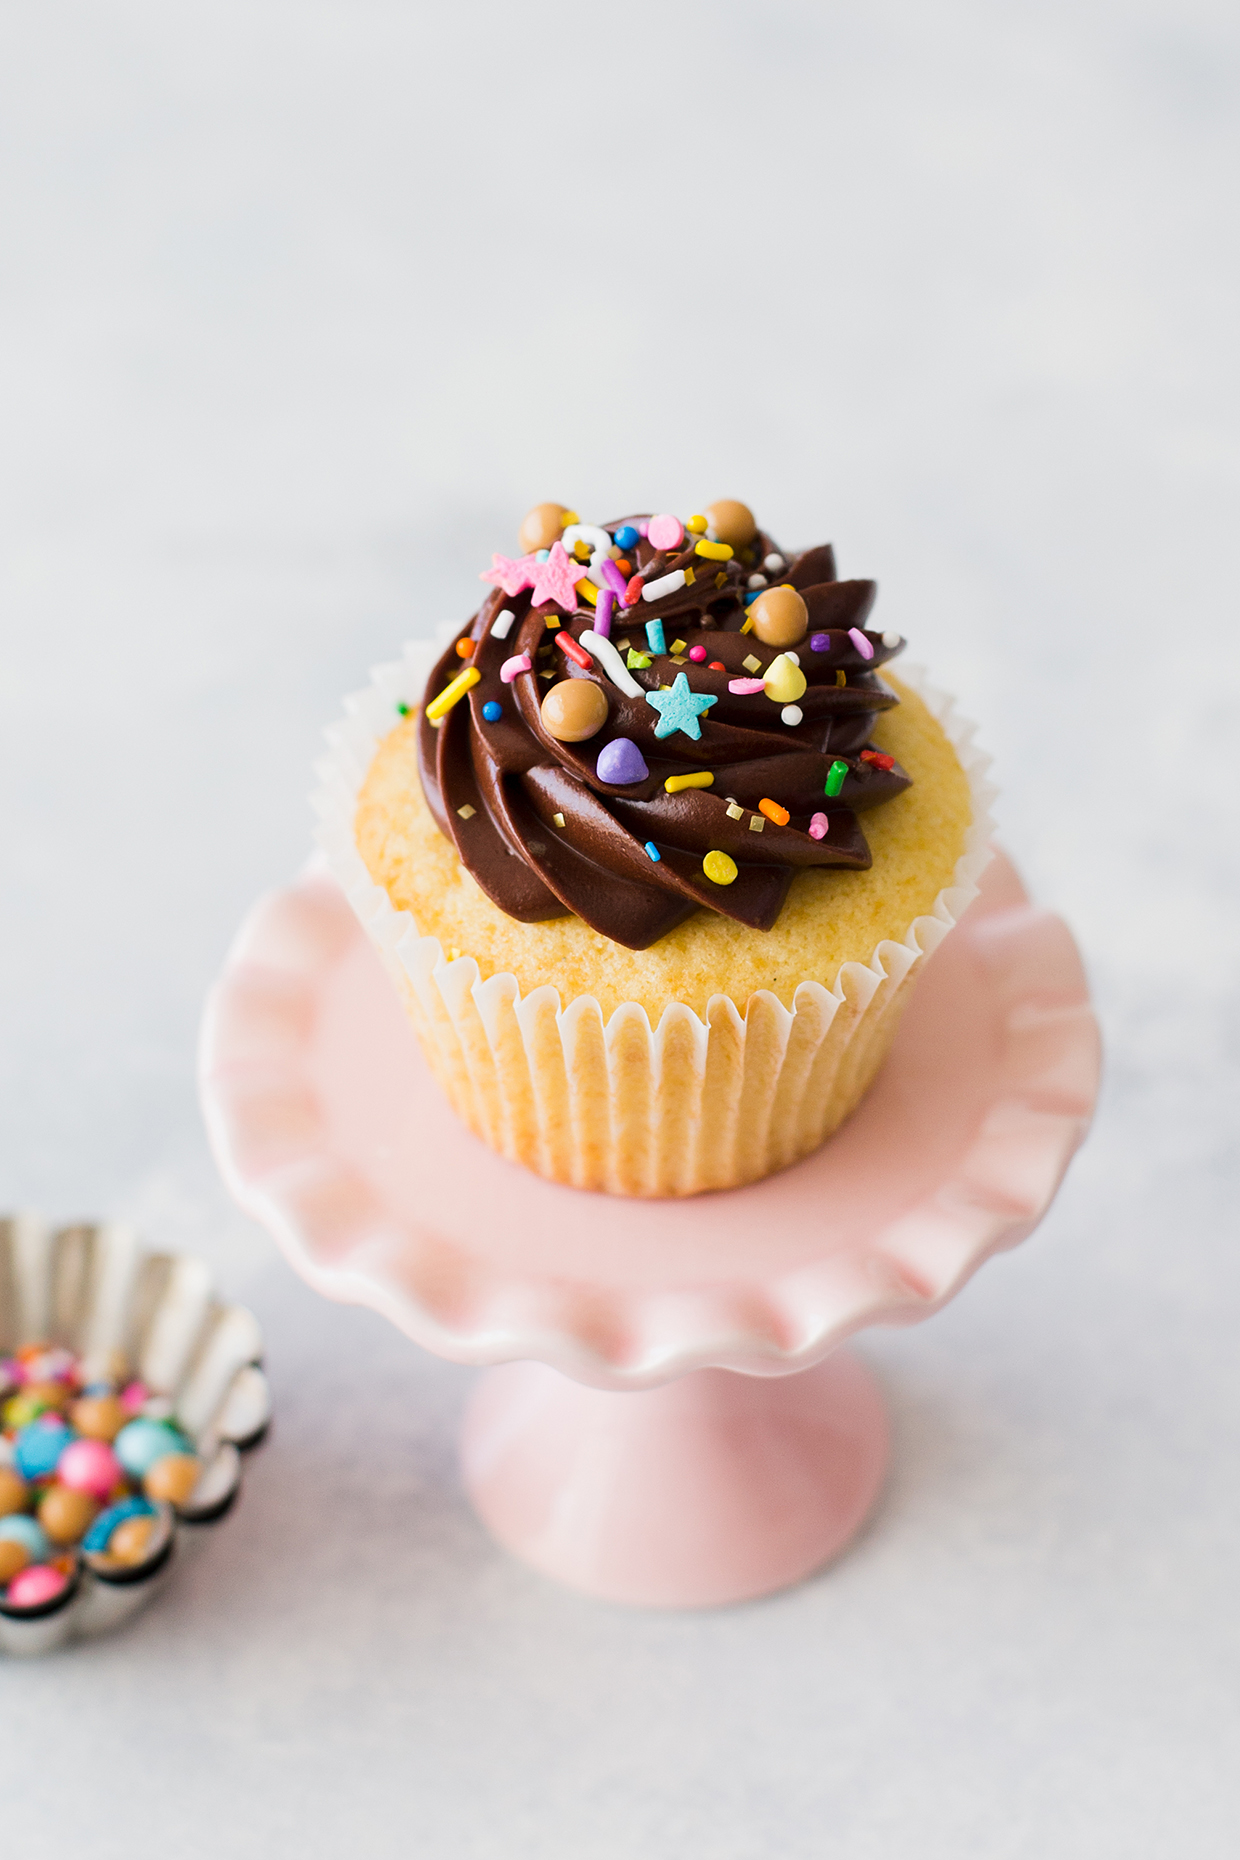 When I think of the quintessential birthday cake, yellow cake with chocolate frosting is always the first image my mind conjures. It’s a classic for good reason! The buttery, fluffy yellow cake goes so well with chocolate frosting. These cupcakes feature all the things we love about this classic pairing in exactly one dozen cupcakes.