 I love an easy, no-bake summer dessert. It means not heating up the kitchen and more time for summertime activities like lounging on the beach or by a pool or just hanging out on the patio with some good conversation and something cool to sip. This berry-spangled icebox cake is the perfect no-bake treat for any summer gathering but it’s particularly festive for a 4th of July spread.
…
 It’s #popsicleweek!! These Raspberry Vanilla Yogurt pops are super easy because that’s what I need in my life right now (and more sleep, plz?). I’m not going to call them healthy because there is a good amount of sugar in these, but the ingredients are simple enough that I’m totally okay with giving these to my kid without an ounce of guilt.
 HELLO! I am so excited to bring you this snack cake for a couple of reasons. June is officially a HUGE month for us because last Tuesday (6/5/2018) we welcomed our baby girl, Luna Violet, into this world! She is the sweetest little peach and we are all absolutely smitten with her. It was an emotional day, to say the least. The second I heard her cries I burst into tears. Then when my mom brought Casper by the hospital to meet his baby sister and he immediately fell in love with her (he tells her he misses her and asks about how she is constantly) and my heart melted into a puddle and it has yet to recover. It seriously may be the best feeling in the world and I may or may not be tearing up as I write this (spoiler alert, I totally am). Besides the huge new addition of our girl to the fam, it’s also my birthday this week, Father’s day, AND our anniversary next week. Needless to say, June is officially a BFD in this house.
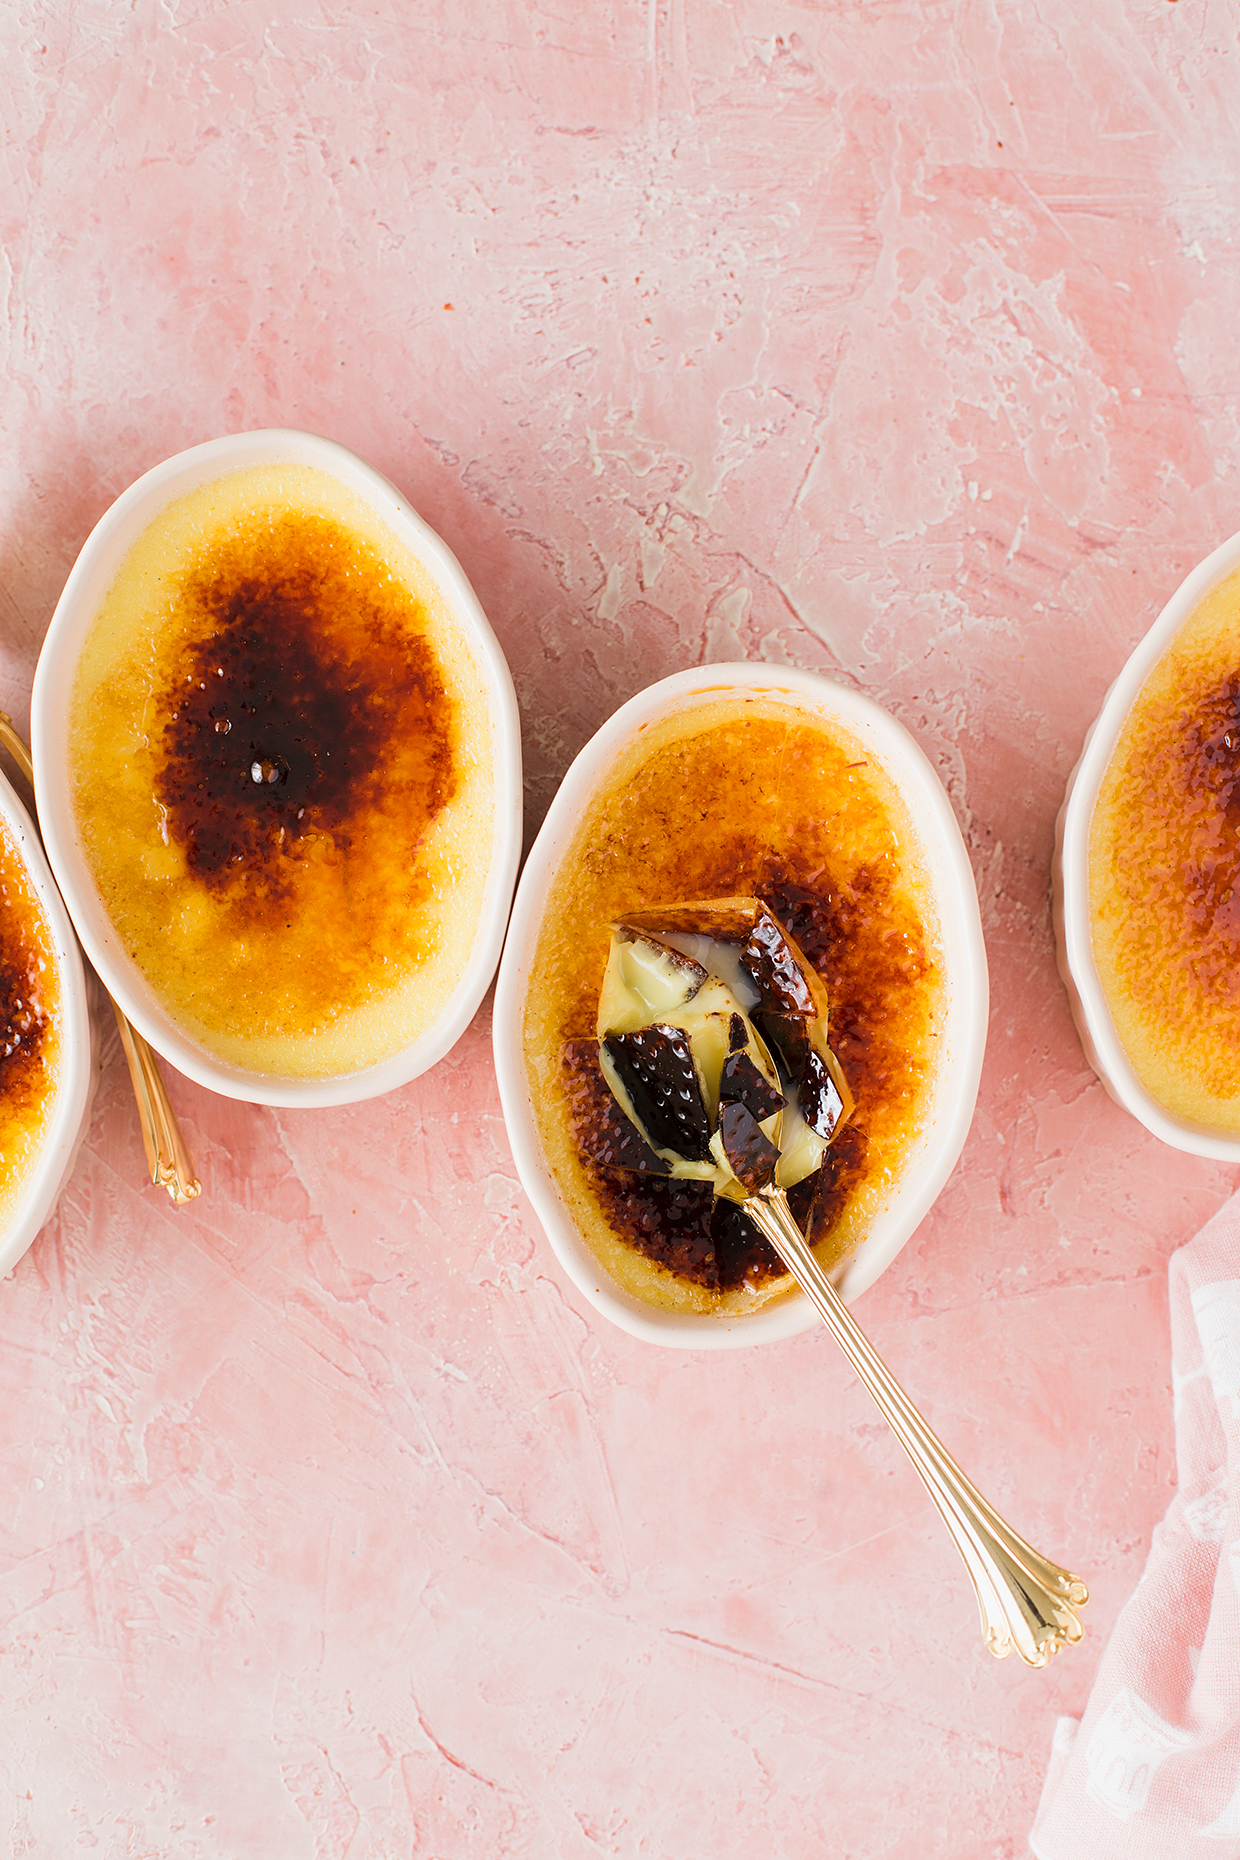 This weekend is Mother’s Day and I’ve had this recipe tucked into my back pocket just for the occasion. My mom almost always has room for dessert–she even orders brunch dessert like crepes or french toast for the table to share when we go out! Créme brûlée definitely tops her list of favorites though, she always orders it on any menu and loves cracking through that top layer of brûléed sugar before delving into the creamy custard below…I mean, who doesn’t though?
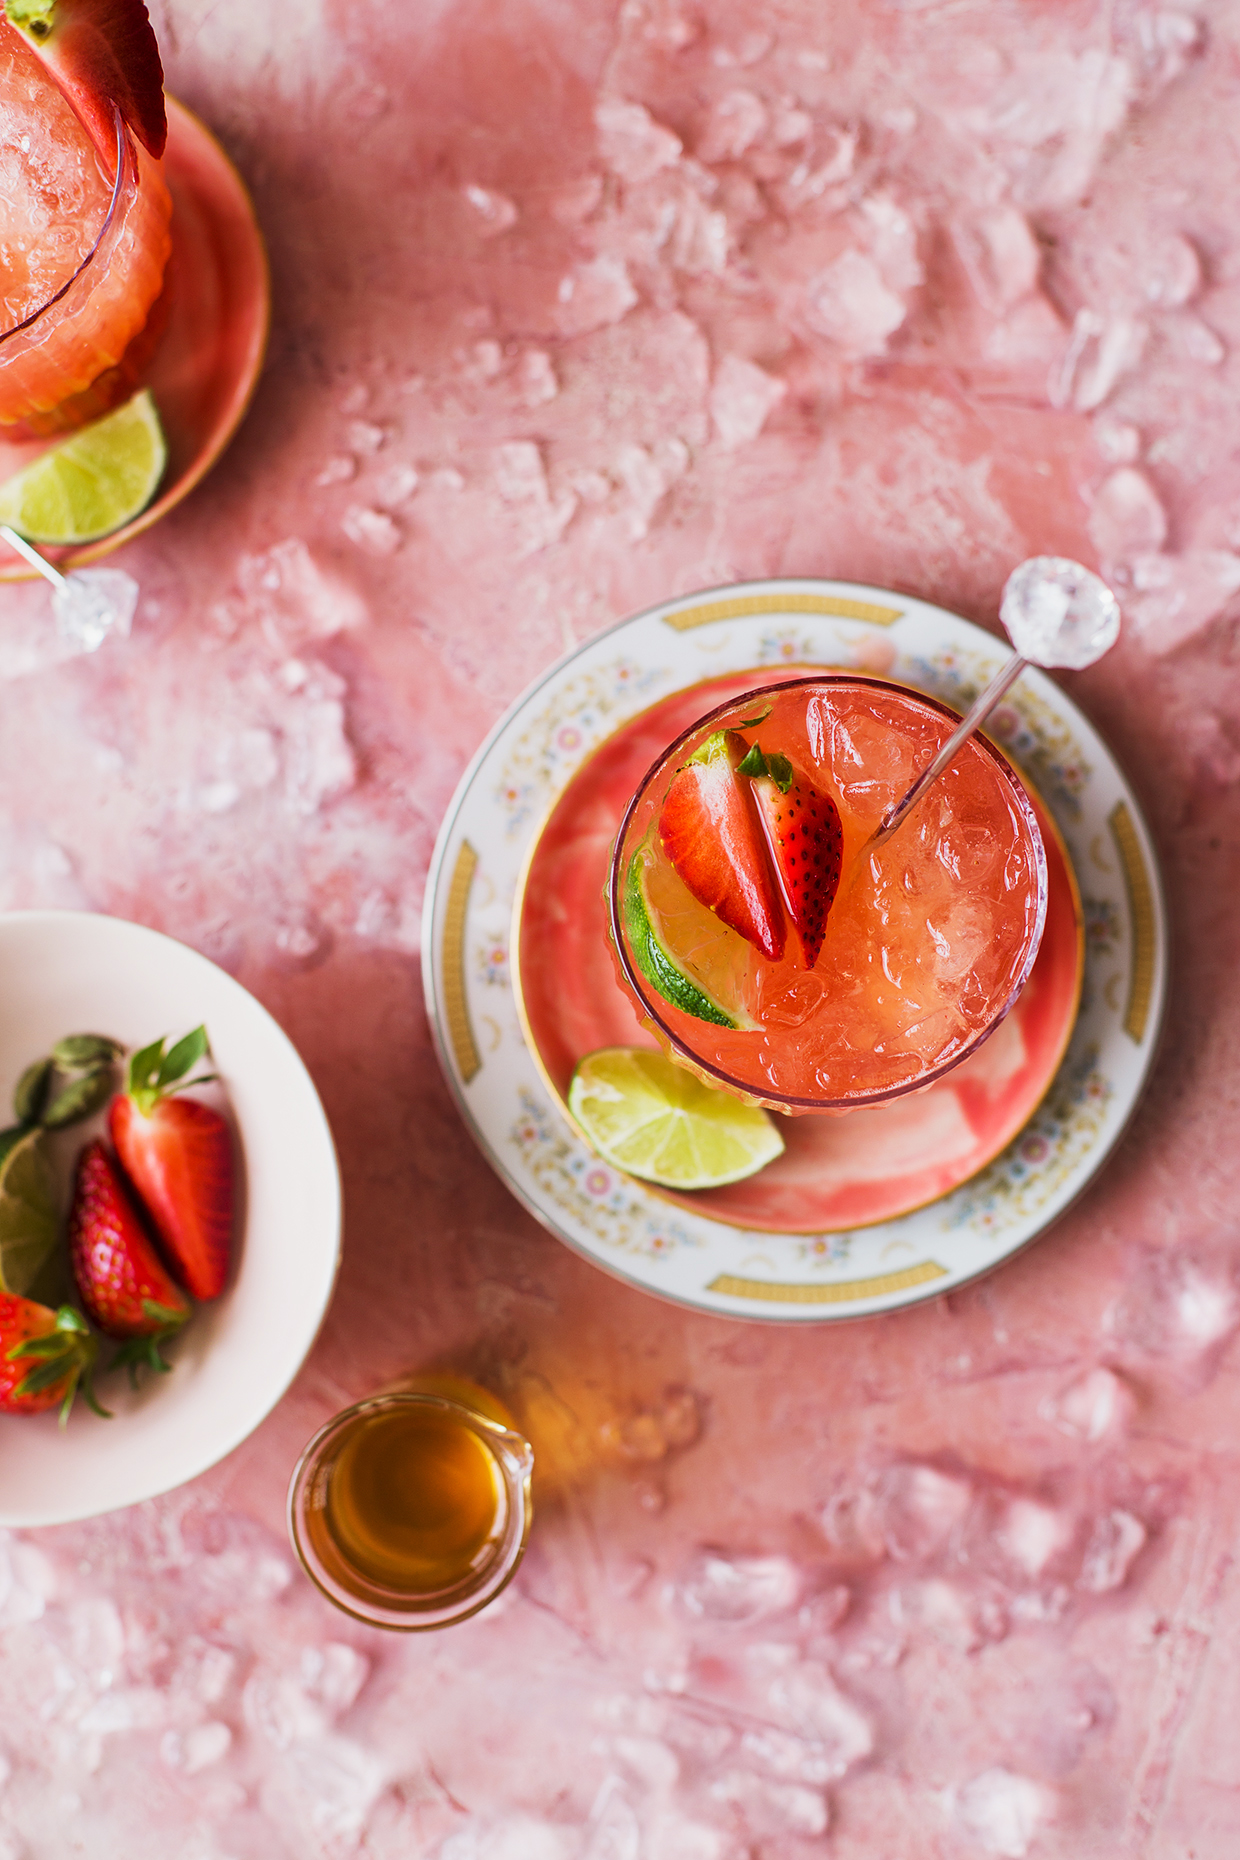 Some of you may know if you follow my Instagram that I am pregnant with a baby girl (due June 5th!) and recently I took a little staycation instead of a baby shower with some of my best girlfriends. There was a spa day, a dinner out, and brunch the next morning at one my favorite Reno restaurants–Midtown Eats. Normally I’m all about that brunch cocktail life, but since that’s obviously not an option, I had a housemade soda with cardamom and strawberry syrups and it was such a good combo!
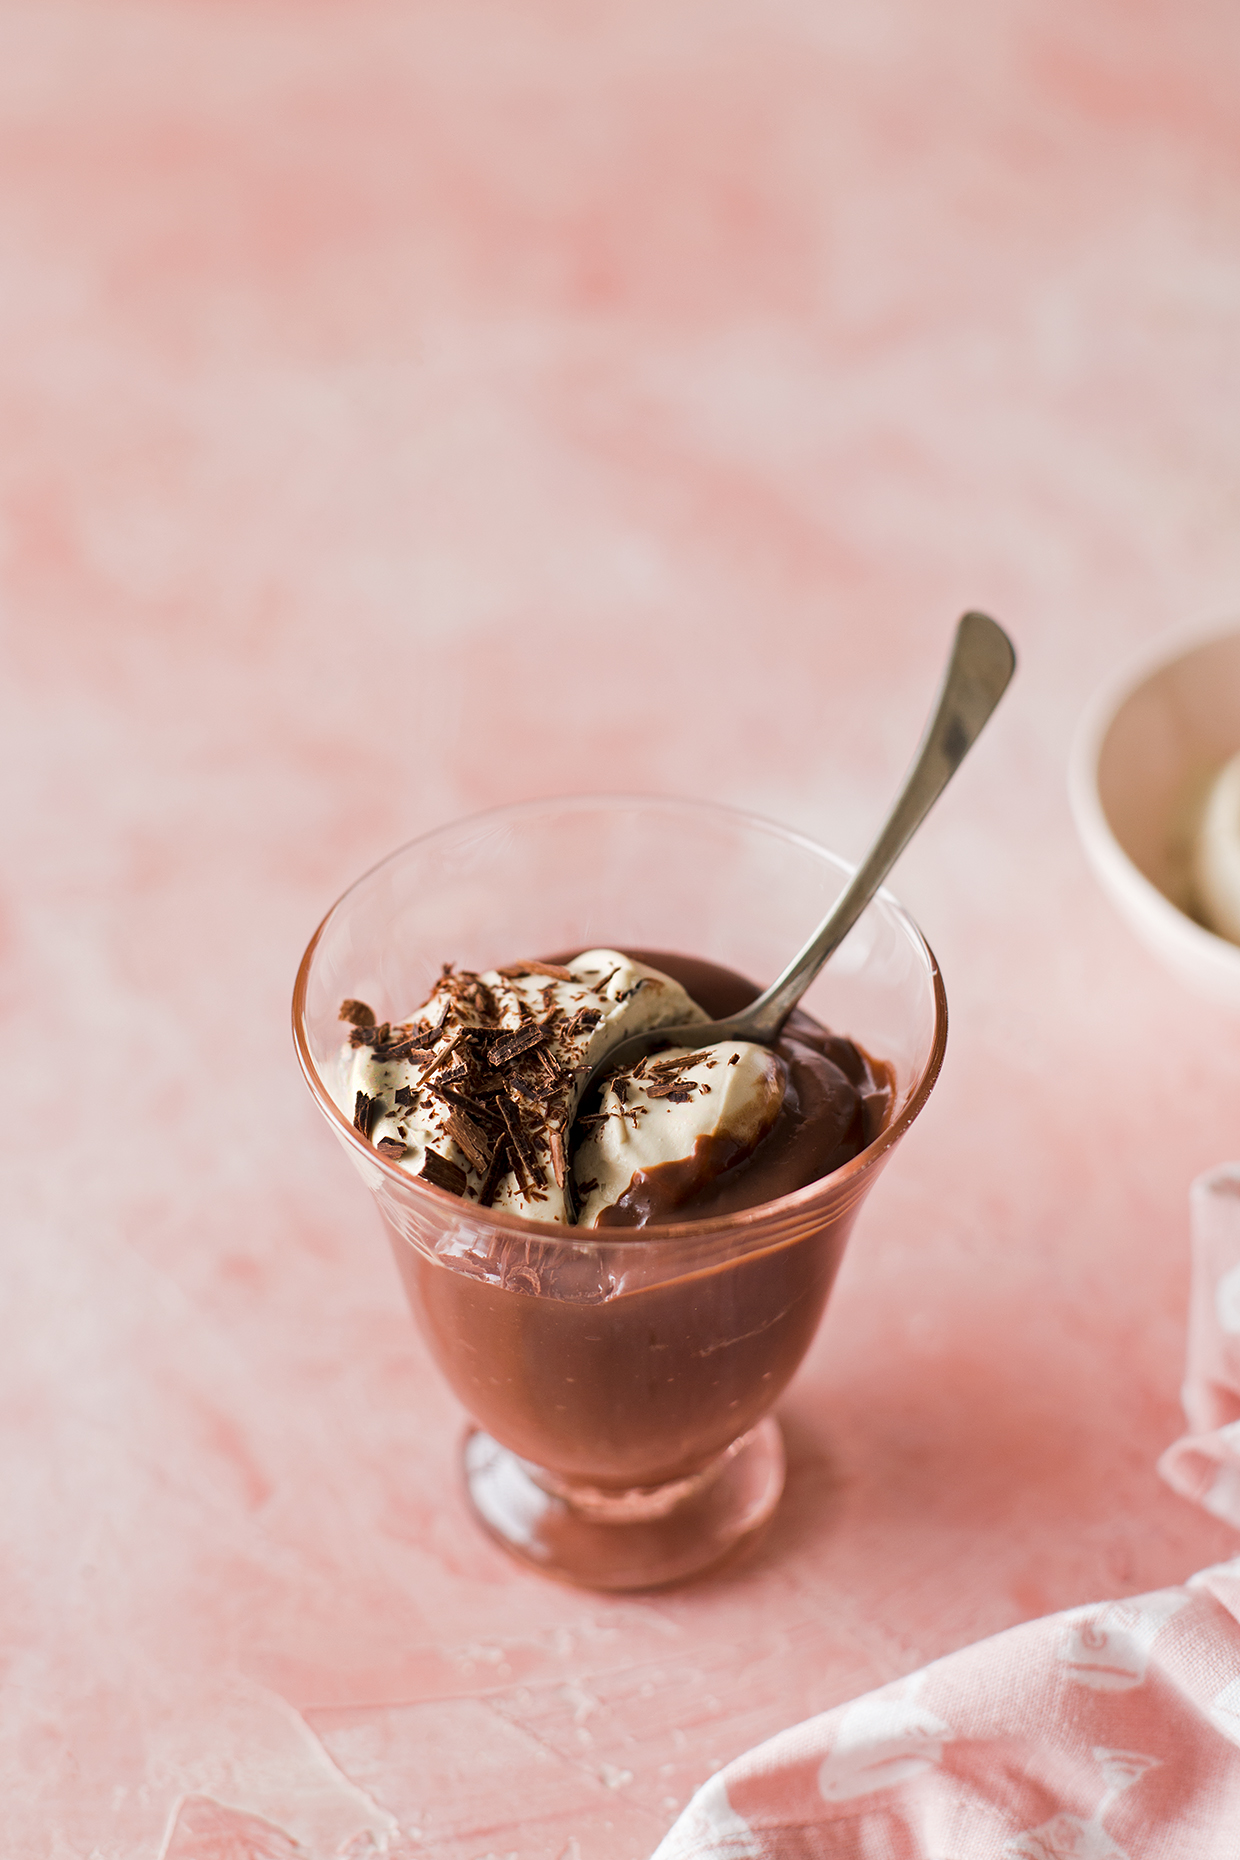 Have you ever made chocolate pudding from scratch? It’s silky and rich and worlds away (IMHO) from the powder packet or plastic cup varieties. I can take a pass on all other chocolate puddings but cann0t resist a good homemade version.
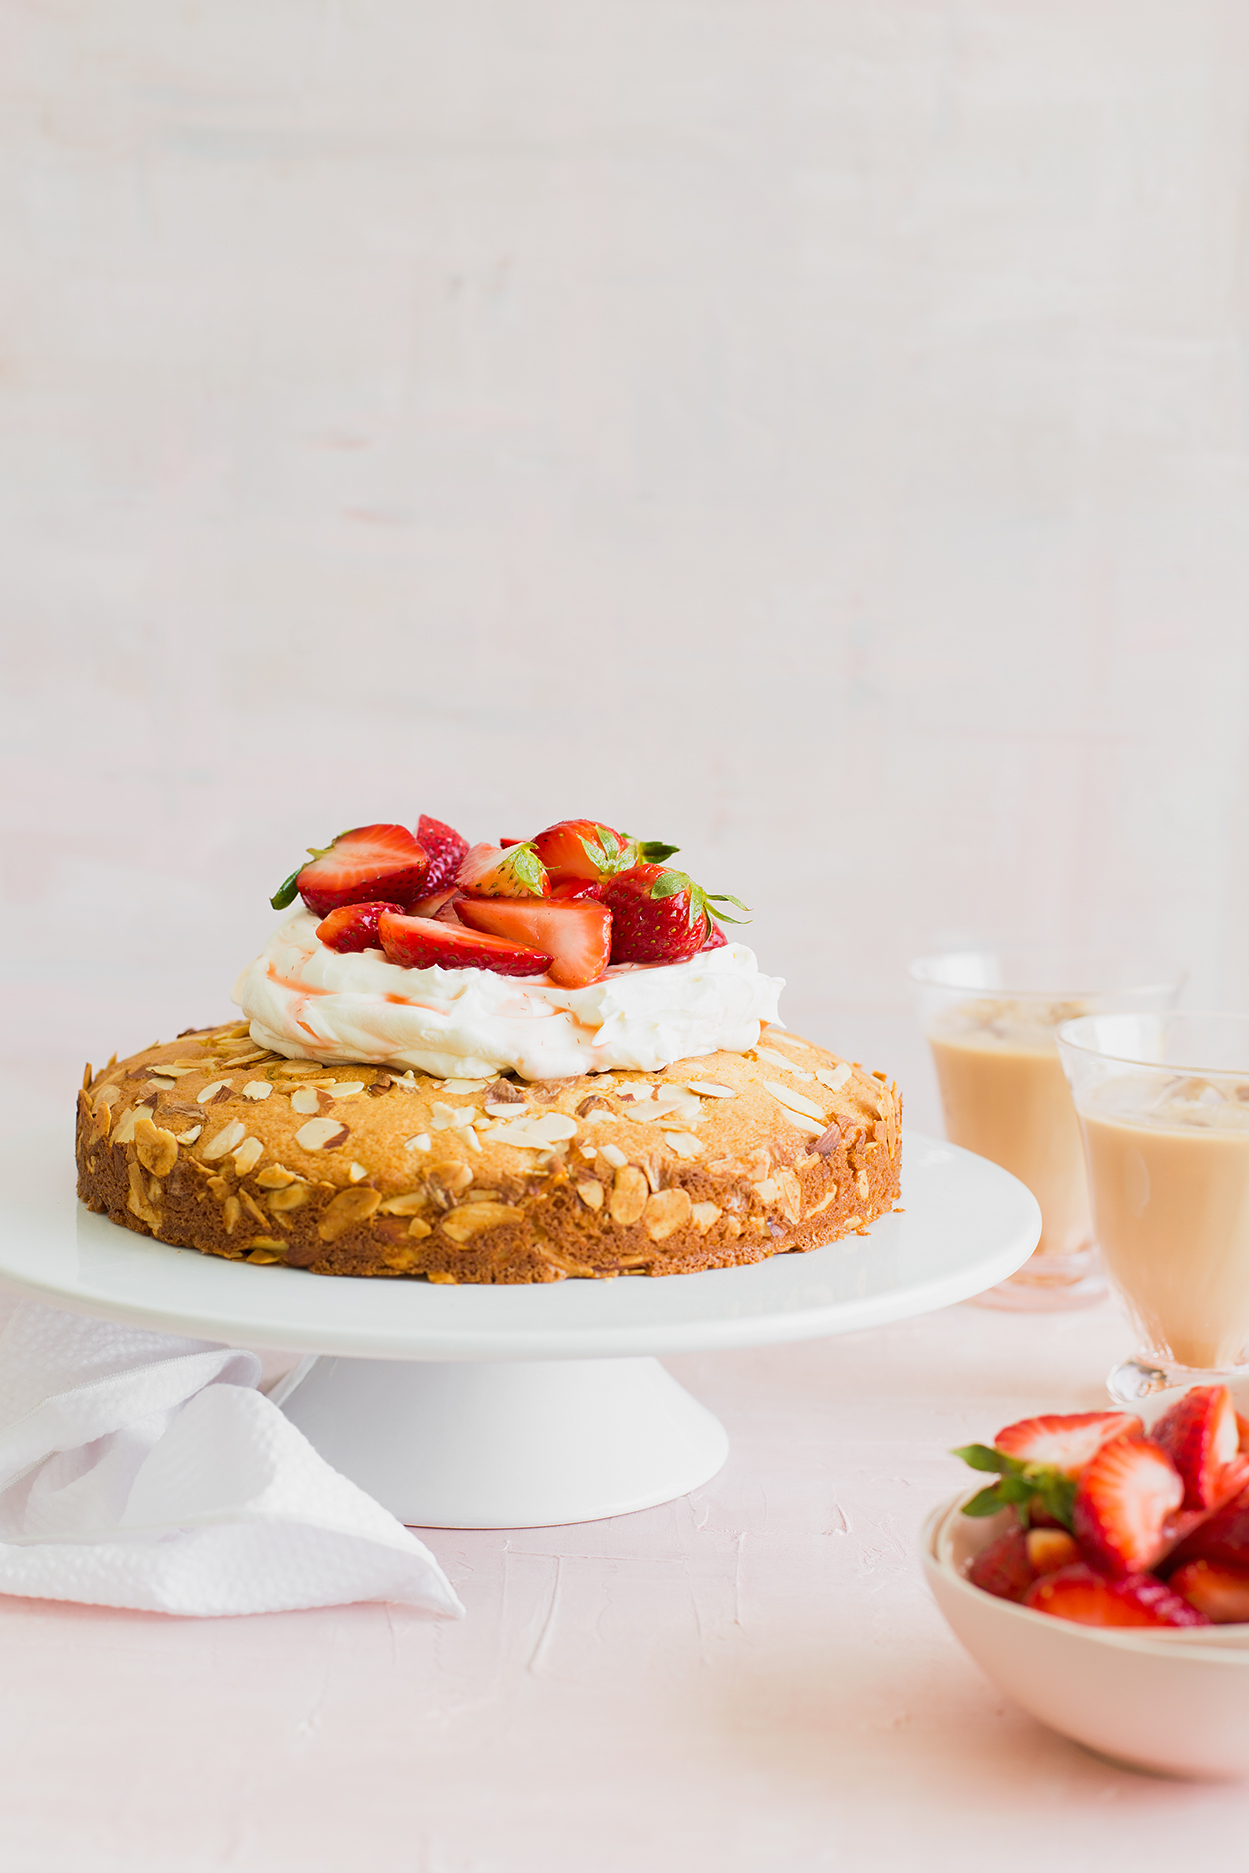 I woke up this morning to a dusting of snow on the ground (April in Northern Nevada, y’all…) and the realization that I’ll be birthing my second real human baby in 7 weeks. YIKES. I have a ton to do the next month or so around the house and in prep for taking some time off to soak in that new baby girl goodness and also adjust to parenting TWO children.